5 Free, Easy-to-Use Instagram Presets for Stunning Photos
Instagram presets are a no-brainer for any social media marketer.
Not only do they help speed up your workflow, they add that extra polish that sets your brand apart. And with more than 25 million businesses on Instagram, a little polish can go a long way.
Whether you’re new to presets or you consider yourself a preset pro, there’s plenty here for every skill level, including:
- Free Instagram presets from Hootsuite
- A breakdown of what Instagram presets are
- Why you should use presets for Instagram
- How to use Lightroom presets
- The best Instagram preset tips and tricks
So, ready to get started? Ready, preset, go!
Save time editing photos and download your free pack of 5 customizable Instagram presets now.
What are Instagram Presets?
Instagram presets are predefined edits that allow you to transform images in a single click. In other words, they’re basically filters. Presets can be downloaded on your computer or phone, and are available from a variety of sources.
You can also create your own presets for Instagram using the photo editing app Lightroom. This can come in handy when you like the edits you make on a specific photo and want to remember them for later. Or it’s good timesaver when you find yourself making the same edits to photos repeatedly.
Why use Instagram Presets?
Here are the top three reasons you should consider using presets for Instagram:
Saves you time
No more fussing over photos for minutes upon hours. The whole point of presets is that they are hassle-free. They can be applied to images one by one, or to batches of similar photos.
The nice thing about using Lightroom presets over Instagram’s editing tools is that you can size and save your photos in high quality.
That way you can easily format it for a post or Instagram Story, where editing options are limited. You can also share the photo on other social media sites with minimal extra effort.
Bookmark this social media image size guide for future reference.
Strengthens your brand identity
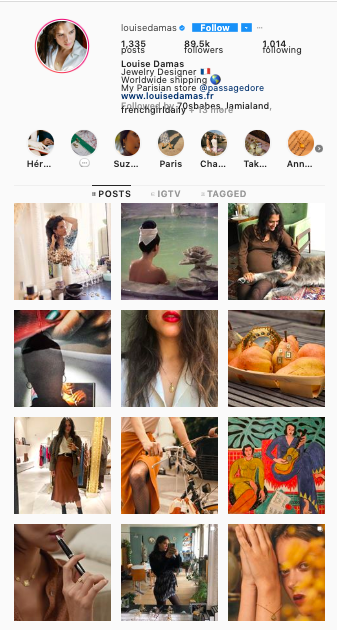
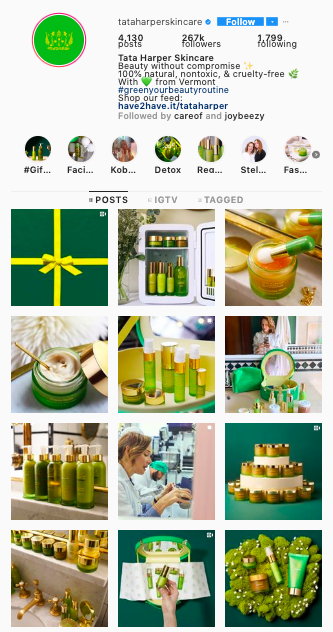
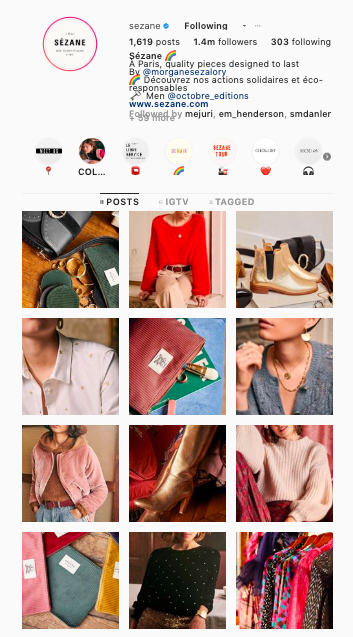
Instagram filters allow you to create a cohesive aesthetic. That may not seem super important. But it could be the difference between someone following your company or not.
Visuals convey a lot of information. Without a streamlined style, your brand’s personality can get lost in the shuffle. Even worse, it could come across as chaotic and untidy.
Presets can help define your brand’s visual identity. For example, a dark and moody editorial look might fit a premium clothing company. Bright and sunny might be a better fit for a travel or childcare business.
Once you determine a preset that works for your Instagram photos and fits with your brand, you can use the same one for all your photos instead of fiddling to achieve the same look every time you create a new post.
Adds polish to your creative
The #nofilter days are long gone, especially if Instagram is an important channel for your business. Presets add the polishing touches that make your content look professional.
Creating strong visuals was once expensive. Now, with so many free tools available, there’s no excuse for a brand to post subpar content. Poor-quality images reflect on your brand. The good news is, high-quality visuals can have the opposite effect.
Show your customers and clients that your business pays attention to detail. Take advantage of Hootsuite’s free Instagram presets to sharpen your visual game.
How to use free Instagram Presets
If you’re new to using presets for Instagram, they can seem a bit daunting. But our simple, step-by-step guide takes all the mystery out of it.
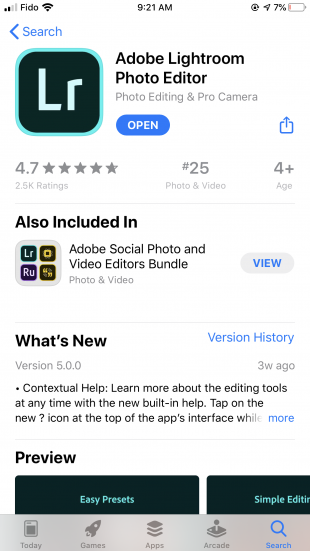
1. Download the app Adobe Lightroom Photo Editor on your mobile device.
2. On your desktop, download the zip file below for our free Instagram presets, then unzip it.
Save time editing photos and download your free pack of 5 customizable Instagram presets now.
3. Open each folder to make sure it has a .png and .dng file in it. 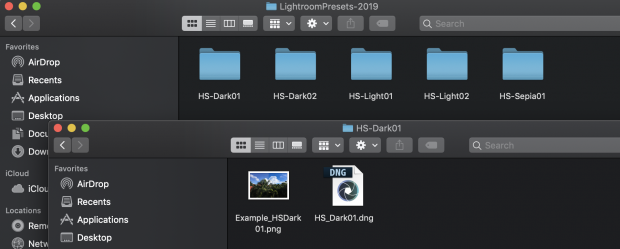
4. Send the .dng files to your phone by email or using Airdrop. Open them on your mobile device.
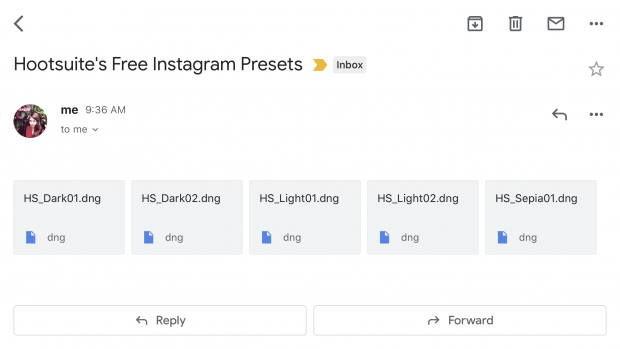
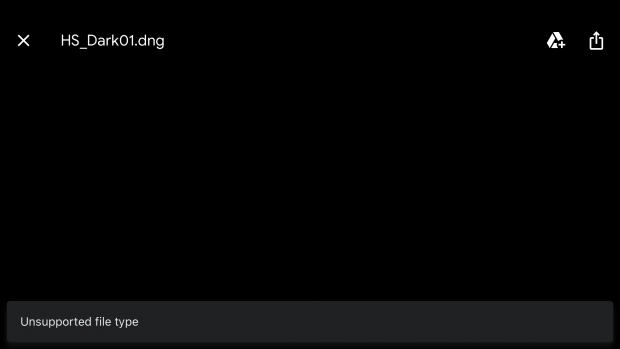
5. Open each file. To save it to your phone, tap save icon (on Apple devices this is a box with an upward arrow). Then select Save Image. You may see a message that reads “Unsupported file type.” This is normal.
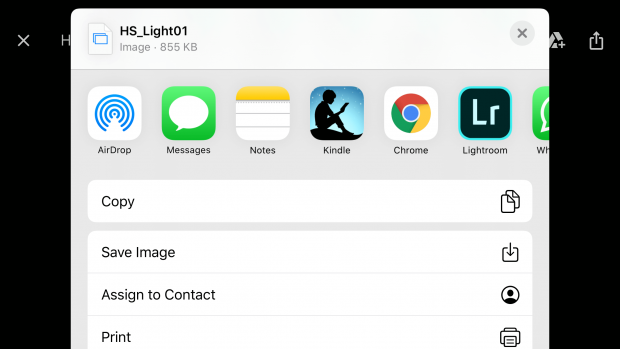
6. Open Adobe Lightroom. If you do not already have an account, sign up. Tap the import icon in the lower right-hand corner to import the .dng files.
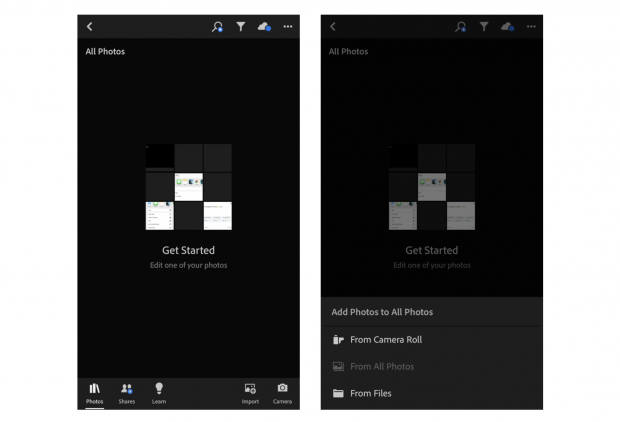
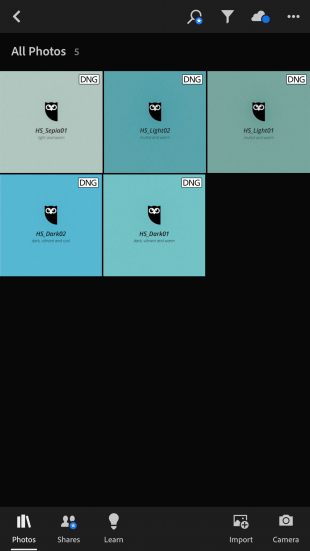
7. Hootsuite’s free Instagram presets should now be in your Lightroom photo library.
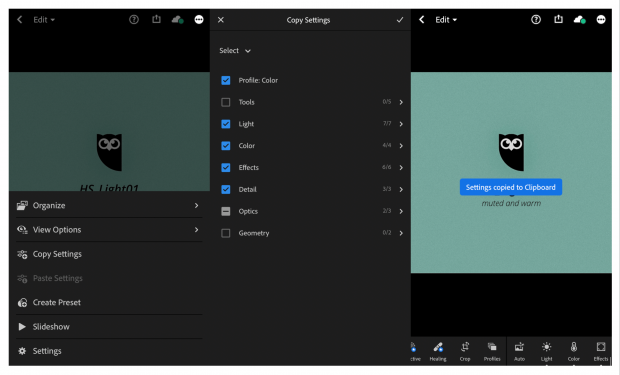
8. Choose the preset you would like to use. Tap the three dots in the top right corner. Click Copy settings and then the checkmark ✓ in the upper right corner.
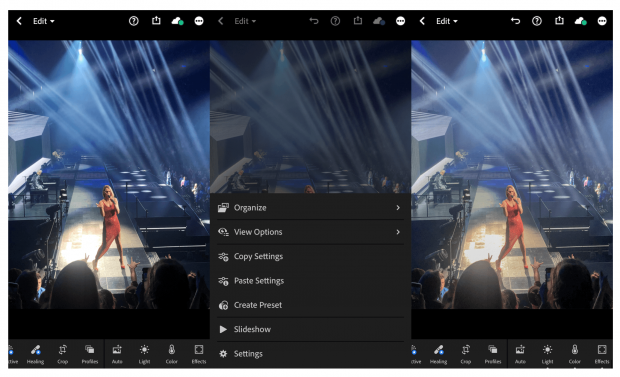
9. Click the arrow icon in the upper left corner to go back to your Lightroom photo library. Select the photo you would like to edit. Tap the three dots in the top right corner, and select Paste settings. If you don’t like the effect, just tap the under arrow at the top of your screen.
10. Once you are happy with your image, click the save icon and to save the image to your camera roll. Make sure to choose the maximum size available.
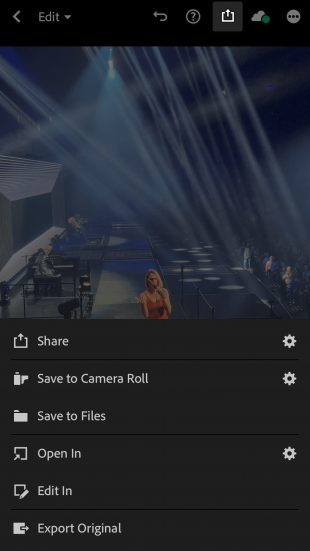
Now you’re all set to share your photo on Instagram, or any other social media network.
Save time editing photos and download your free pack of 5 customizable Instagram presets now.
Get the free presets right now!Tips for using Instagram presets
Lightroom presets for Instagram do most of the work for you, but there’s always room for a little fine-tuning. Use these tips for maximum preset potential.
Start with a good photo
Not even the best Instagram presets can rescue a bad photo. So before getting started, make sure you brush us on photography 101.
Image quality is important. But that doesn’t necessarily mean you need a fancy digital camera. If you have access to one and know how to use it, you should. If you don’t, use your phone. Smartphone cameras keep getting better and better.
Here are a few photography basics:
- Focus on a subject and frame it accordingly
- Use natural light as much as possible
- Avoid using flash if you can, especially for portraits
- Clean your lens to avoid blurry images
- Make sure your original file is not too small
Here are some more tips for creating engaging visual content on social media.
Make adjustments when needed
There’s no such thing as a one-size-fits-all Instagram preset. Some presets simply won’t work with certain photos, in which case you shouldn’t use them.
In other cases, minor adjustments may be required. For example, perhaps the Instagram preset makes the photo too dark. Something like this can be easily fixed by upping the exposure or reducing the shadows in the Light tab.
You can also use Lightroom to straighten crooked photos, or to crop out the unwanted photobomb. These features can be found in the Crop tab.
Don’t oversaturate images
A cardinal sin in the creative world is oversaturation. There are almost no cases where a supersaturated image is called for—and those times are best left to professionals.
Watch out especially for high-volume blues and reds, or the lime green and neon pinks that are caused by chromatic aberration. To remove chromatic aberration, scroll through the menu at the bottom of your screen and select optics. Then tap Remove Chromatic Aberration.
Vibrant colours can be created in various ways. In many cases it can simply be a matter of brightening the exposure photo that was taken in a dark setting. You can also adjust colour temperature and vibrance in the Color tab of the menu.
Stick to a few styles
Remember, one of the best reasons to use Instagram presets is to ensure your feed has a cohesive look. That won’t work if you use too many different kinds.
Keep a few filters on hand that work for different styles of photos you post. This way you can add variety to your feed without compromising its overall cohesion. Take a checkered pattern approach so that you evenly alternate between presets and styles.
You can plan and preview what your feed will look like with Instagram tools like UNUM or Preview App. Or do it the free and old-fashioned way and storyboard. Just copy images into three-square grid in a Google Doc or related program.
After that you can go ahead and schedule your posts. Here’s how to do it.
Our free Instagram preset downloads
Dark (01)
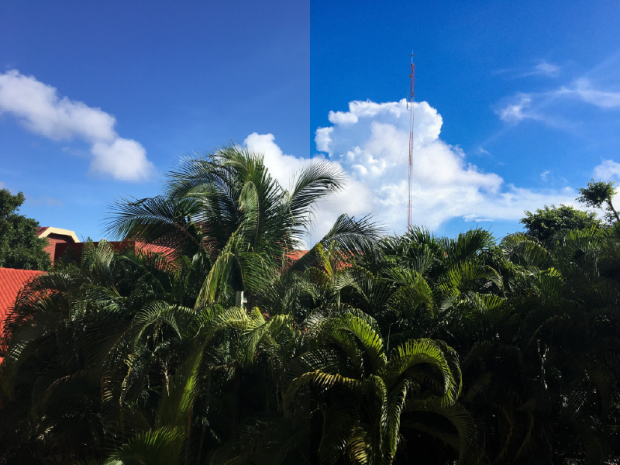
Dark (02)
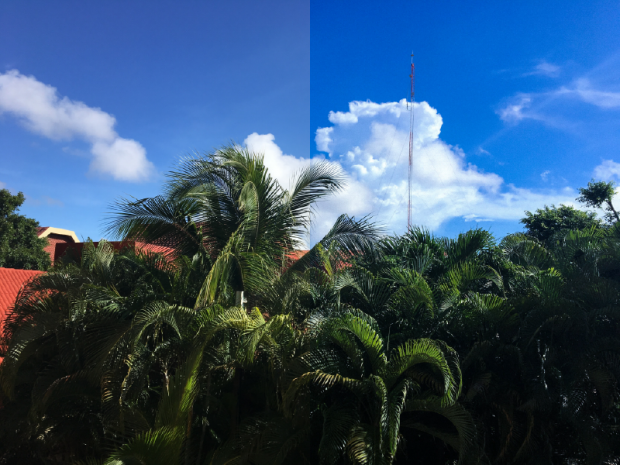
Light (01)
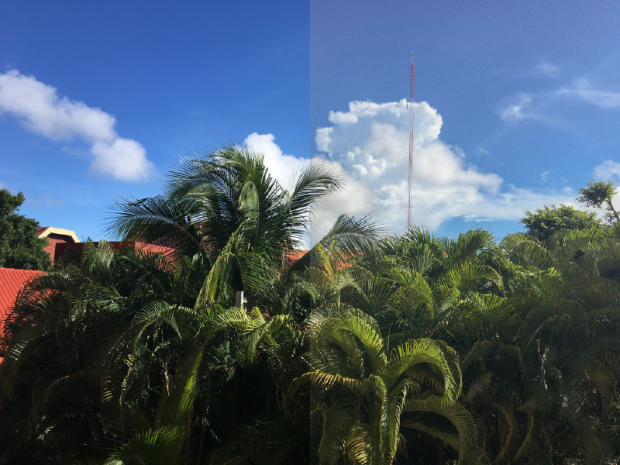
Light (02)
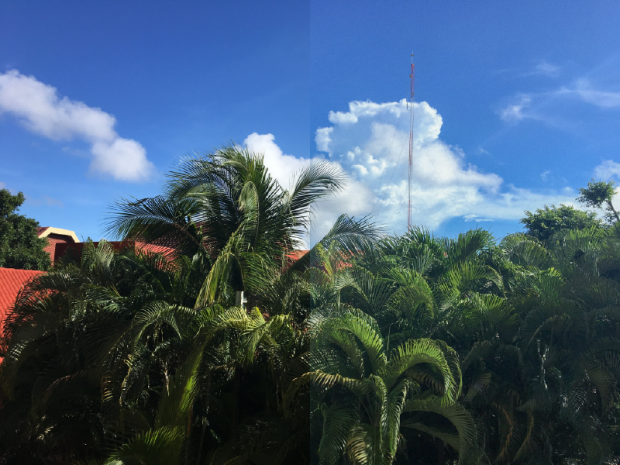
Sepia
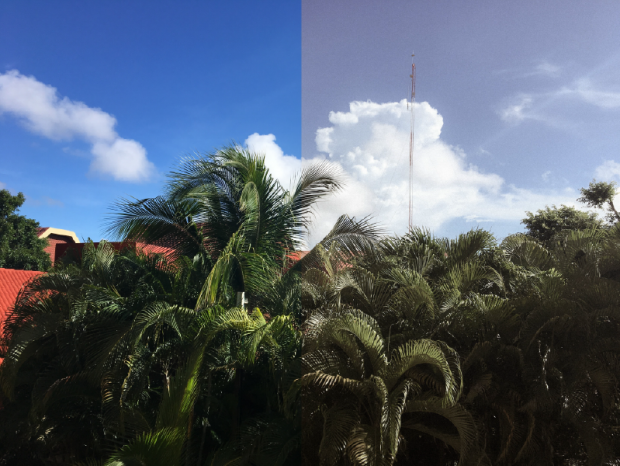
Save time managing your Instagram presence using Hootsuite. From a single dashboard you can schedule and publish your perfectly edited photos directly to Instagram, engage your audience, measure performance, and run all your other social media profiles. Try it free today.
The post 5 Free, Easy-to-Use Instagram Presets for Stunning Photos appeared first on Hootsuite Social Media Management.
Categories
- 60% of the time… (1)
- A/B Testing (2)
- Ad placements (3)
- adops (4)
- adops vs sales (5)
- AdParlor 101 (43)
- adx (1)
- algorithm (1)
- Analysis (9)
- Apple (1)
- Audience (1)
- Augmented Reality (1)
- authenticity (1)
- Automation (1)
- Back to School (1)
- best practices (2)
- brand voice (1)
- branding (1)
- Build a Blog Community (12)
- Case Study (3)
- celebrate women (1)
- certification (1)
- Collections (1)
- Community (1)
- Conference News (1)
- conferences (1)
- content (1)
- content curation (1)
- content marketing (1)
- contests (1)
- Conversion Lift Test (1)
- Conversion testing (1)
- cost control (2)
- Creative (6)
- crisis (1)
- Curation (1)
- Custom Audience Targeting (4)
- Digital Advertising (2)
- Digital Marketing (6)
- DPA (1)
- Dynamic Ad Creative (1)
- dynamic product ads (1)
- E-Commerce (1)
- eCommerce (2)
- Ecosystem (1)
- email marketing (3)
- employee advocacy program (1)
- employee advocates (1)
- engineers (1)
- event marketing (1)
- event marketing strategy (1)
- events (1)
- Experiments (21)
- F8 (2)
- Facebook (64)
- Facebook Ad Split Testing (1)
- facebook ads (18)
- Facebook Ads How To (1)
- Facebook Advertising (30)
- Facebook Audience Network (1)
- Facebook Creative Platform Partners (1)
- facebook marketing (1)
- Facebook Marketing Partners (2)
- Facebook Optimizations (1)
- Facebook Posts (1)
- facebook stories (1)
- Facebook Updates (2)
- Facebook Video Ads (1)
- Facebook Watch (1)
- fbf (11)
- first impression takeover (5)
- fito (5)
- Fluent (1)
- Get Started With Wix Blog (1)
- Google (9)
- Google Ad Products (5)
- Google Analytics (1)
- Guest Post (1)
- Guides (32)
- Halloween (1)
- holiday marketing (1)
- Holiday Season Advertising (7)
- Holiday Shopping Season (4)
- Holiday Video Ads (1)
- holidays (4)
- Hootsuite How-To (3)
- Hootsuite Life (1)
- how to (5)
- How to get Instagram followers (1)
- How to get more Instagram followers (1)
- i don't understand a single thing he is or has been saying (1)
- if you need any proof that we're all just making it up (2)
- Incrementality (1)
- influencer marketing (1)
- Infographic (1)
- Instagram (39)
- Instagram Ads (11)
- Instagram advertising (8)
- Instagram best practices (1)
- Instagram followers (1)
- Instagram Partner (1)
- Instagram Stories (2)
- Instagram tips (1)
- Instagram Video Ads (2)
- invite (1)
- Landing Page (1)
- link shorteners (1)
- LinkedIn (22)
- LinkedIn Ads (2)
- LinkedIn Advertising (2)
- LinkedIn Stats (1)
- LinkedIn Targeting (5)
- Linkedin Usage (1)
- List (1)
- listening (2)
- Lists (3)
- Livestreaming (1)
- look no further than the new yorker store (2)
- lunch (1)
- Mac (1)
- macOS (1)
- Marketing to Millennials (2)
- mental health (1)
- metaverse (1)
- Mobile App Marketing (3)
- Monetizing Pinterest (2)
- Monetizing Social Media (2)
- Monthly Updates (10)
- Mothers Day (1)
- movies for social media managers (1)
- new releases (11)
- News (72)
- News & Events (13)
- no one knows what they're doing (2)
- OnlineShopping (2)
- or ari paparo (1)
- owly shortener (1)
- Paid Media (2)
- People-Based Marketing (3)
- performance marketing (5)
- Pinterest (34)
- Pinterest Ads (11)
- Pinterest Advertising (8)
- Pinterest how to (1)
- Pinterest Tag helper (5)
- Pinterest Targeting (6)
- platform health (1)
- Platform Updates (8)
- Press Release (2)
- product catalog (1)
- Productivity (10)
- Programmatic (3)
- quick work (1)
- Reddit (3)
- Reporting (1)
- Resources (34)
- ROI (1)
- rules (1)
- Seamless shopping (1)
- share of voice (1)
- Shoppable ads (4)
- Skills (28)
- SMB (1)
- SnapChat (28)
- SnapChat Ads (8)
- SnapChat Advertising (5)
- Social (169)
- social ads (1)
- Social Advertising (14)
- social customer service (1)
- Social Fresh Tips (1)
- Social Media (5)
- social media automation (1)
- social media content calendar (1)
- social media for events (1)
- social media management (2)
- Social Media Marketing (49)
- social media monitoring (1)
- Social Media News (4)
- social media statistics (1)
- social media tracking in google analytics (1)
- social media tutorial (2)
- Social Toolkit Podcast (1)
- Social Video (5)
- stories (1)
- Strategy (608)
- terms (1)
- Testing (2)
- there are times ive found myself talking to ari and even though none of the words he is using are new to me (1)
- they've done studies (1)
- this is also true of anytime i have to talk to developers (1)
- tiktok (8)
- tools (1)
- Topics & Trends (3)
- Trend (12)
- Twitter (15)
- Twitter Ads (5)
- Twitter Advertising (4)
- Uncategorised (9)
- Uncategorized (13)
- url shortener (1)
- url shorteners (1)
- vendor (2)
- video (10)
- Video Ads (7)
- Video Advertising (8)
- virtual conference (1)
- we're all just throwing mountains of shit at the wall and hoping the parts that stick don't smell too bad (2)
- web3 (1)
- where you can buy a baby onesie of a dog asking god for his testicles on it (2)
- yes i understand VAST and VPAID (1)
- yes that's the extent of the things i understand (1)
- YouTube (13)
- YouTube Ads (4)
- YouTube Advertising (9)
- YouTube Video Advertising (5)
